
How To make Your Own Ring Light
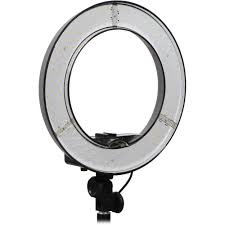
Here is clearly really just a tutorial on the ring light that I left I utilize for the vast majority of my portrait attention on 500px. I have made a couple DIY lights because making my very first ring light, but I prefer the first 12 lights onto a 24″x 24″ plywood to be the high lighting for my portraits.
It is not tricky to construct, but a warning because you're dealing together with power, I suggest having an electrician to construct it to you or provide you with some guidance. If you cable something wrong, you will certainly end up electrocuting yourself, therefore please be safe and just take all the necessary actions.
You can certainly do this endeavor for about $50-$100, based on the particular stuff you select using. My cost for this job is 70.
It requires approximately 1-3 hours in order to complete.
MATERIALS
14-gauge dwelling wiring (roughly 10 feet)
Conventional light outlets x 12
24″x 24″ plywood. I used 1/4″ fir, 3/8 will undoubtedly be stronger
A mild shift. I selected a 600-watt flatter switch
12 bulbs. CFL or incandescent endeavor nice. Bear on your mind incandescent. Ensure that you don't go your switch may manage. I used routine household bulbs.
Power-cable
Small bag of cable connectors
Zip-ties
Bracket Together with spigot for mounting in your gentle rack
Electric tape
Electric box
TOOLS
Jig Saw
Drill
Cable cutters and strippers
Screw-driver
Pliers
Box-cutter
Measuring tape
Pencil
String
Recommendations
Measure and mark at the middle of somebody's plywood at 1-2 inches. Join to your own pencil to draw on. Utilize soft box of those outlets to assess. Do the specific same.
Make use of the ribbon and cut your outer and inner circles. For your circle, then leave a large part , which usually means you have a place for mounting bracket as well as your setting. You'll have a tear drop shape using a pit inside , as soon as you're finished. You are ready to indicate and quantify 12 points to the sockets. I conspicuous that which and chucked out my sockets. Drill the 12 holes outside using a 7/16″ piece, or whatever is near enough that you're able to nourish 4 cables.
You're going to have to strip the cable. Eliminate the outer protector then cut 8-10″ pieces of those black and white pairs. You'll need 1 2 pairs as a whole. Then you will have to strip the endings of each cable, then approximately 3/4″ bare cable and use the pliers to make hooks on the empty cord. You'll feed 4 wires through each of the 1 2 holes that you drilled and cable each light socket.
I pumped mine. You'll wish to take some own time and effort, and be sure the polarity isn't mixed up by to. Both white wires go to the 2 gold contacts onto the lighting socket. Both black wires visit the silver connections. Ensure to nourish the cable therefore when the screws twist, the cable doesn't twist . Check your work, and don't clutter up this. You also ought to really have 1 black and 1 white cable left Since you cable around the ring. Do not cable these you've started --these will be wired with you according to.
For my dimmer change:
White cable extends straight to the power cable
The black has squeezed in to the Shift
The flooring from the flip expands in to the floor on the green electricity cable
Secure your wires and capture them.
Now is a fantastic moment. Screw a lamp at the light socket that's beyond, and examine drive out that. It should act like a light switch. Then you awakened, if it won't function and you also should unplug your lighting and then check your pipes.
It's perhaps not plugged into the socket also When you know your wiring works, zip-tie everything. Drillholes to the zip-ties. You may possibly take the end of this tear drop, and that means you obtain a set edge to your mounting bracket. Critical: Be certain that you aren't attached to the wall if you are employed in your own lighting! I zip tie every thing, for instance, bracket and switch. Make certain there isn't any cable originating out of the back of the other turn or even the sockets.
Twist your ring light screw in your bulbs and examine driveway out that!
